Wicket: How to create a component
Wicket: How to create a component
Creating a Wicket component is very easy.
Assume that you already have a page, from which you want to „extract“ a component, consisting of several subcomponents, or simply it needs nontrivial code to create – that's why you want to wrap it in a component.
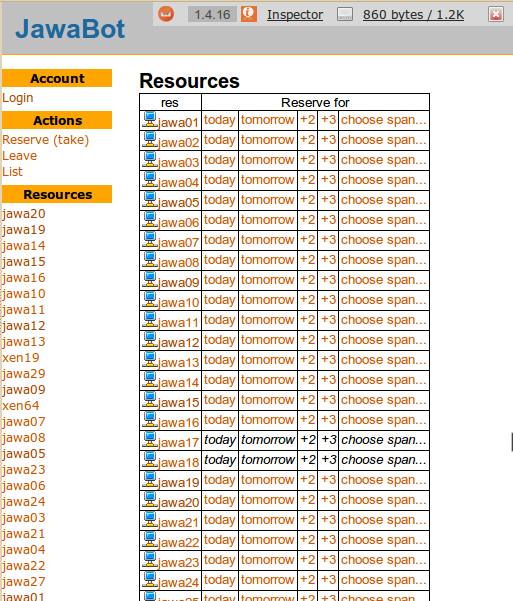
On this page, you have a table of resources, which have a link with an icon. The code to create this link looks like this:
<tr wicket:id="resources">
   <td>
       <a href="#" wicket:id="reslink">
          <img wicket:id="icoType" src="ResourceMachine.gif"/>
          <span wicket:id="label">jawa01</span>
       </a>
   </td>
   ...
</tr>
// Link itself. We're giving the resource as the parameter for the Resource page.
new BookmarkablePageLink("reslink", new ResourcePage( item.getModelObject().getResource() ))
// Icon.
.add( new Image( "icoType", "ResourceMachine.gif" ) )
// Link's kabel
.add( new Label("label", item.getModelObject().getResource().getName() ))
As you can see, it takes about 3 lines of java code and four of HTML to create the link. Let's make it 1+1.
If you wonder what's the item reference –
that's because I took this code from a ListView#populateItem(),
which is usualy used to list a collection.
Turning existing code into a component
Each wicket component usually consists of one HTML file, describing
it's HTML structure, and one Java file, describing everything else. These files
have the same name, and suffixes .html and .java.
The HTML file is a normal page with only few Wicket-specific, but XHTML-compliant additions.
The <wicket:extend> element delimits what is going to be
counted for the component. Everything else is ignored.
<!DOCTYPE html>
<html>
   <head>
      <title>JawaBot resource</title>
      <meta http-equiv="Content-Type" content="text/html; charset=UTF-8">
   </head>
   <body>

   <wicket:panel>
      <a href="#" wicket:id="reslink"><img wicket:id="icoType" src="ResourceMachine.gif"/><span wicket:id="label">jawa01</span></a>
   </wicket:panel>

   </body>
</html>
In Java, we simply create a new class extending
Panel class.
package org.jboss.jawabot.web._co;

import org.apache.wicket.markup.html.basic.Label;
import org.apache.wicket.markup.html.image.Image;
import org.apache.wicket.markup.html.link.BookmarkablePageLink;
import org.apache.wicket.markup.html.panel.Panel;
import org.apache.wicket.model.Model;
import org.jboss.jawabot.Resource;
import org.jboss.jawabot.web._pg.ResourcePage;

/**
 *
 *  @author ondra
 */
public class ResourceLinkPanel extends Panel {

   Resource res;

   public ResourceLinkPanel( String id, final Resource res ) {
      super( id, new Model<Resource>(res) );
      add( new BookmarkablePageLink<Resource>( "link", ResourcePage.class){{
         add( new Image( "icoType", "ResourceMachine.gif" ) );
         add( new Label("label", res.getName() ));
      }});
   }

}
//Side note:// If you ever wanted to use parent component's instance, or
the containing page, you can't do it in the constructor – the component
doesn't have the references initialized yet. You need to override
onInitialize() and move the code therein. For example, you might
want not to render the icon if the page's param says to:
public class ResourceLink extends Panel {

   public <C extends Page> ResourceLink( String id, Resource res ) {
      super( id, ResourcePage.class );
   }

   @Override
   protected void onInitialize() {
      super.onInitialize();
      boolean showImages = ! this.getPage().getPageParameters().getAsBoolean("noImages", false);
      this.add(
        new Image( "icoType", "ResourceMachine.gif" )
          .setVisible( showImages );
      );

      this.add( new Label("label", this.getModelObject().getName() ));
   }

}
Where to put the image file?
The last thing to do is to put the image file somewhere. Actually it's the
easiest part – you simply put the file to the component's package –
that is, the file must end in .jar next to the
ResourceLink.class file – and Wicket will take care of
everything.
It's usual to put resources in the src/main/java dir. Maven
expects them in src/main/resources by default. To make it package
resources from src/main/java, put this to pom.xml:
<build>
   ...
   <resources>
     <!-- Web - Wicket -->
     <resource>
         <filtering>false</filtering>
         <directory>src/main/java</directory>
         <includes><include>**</include></includes>
         <excludes><exclude>**/*.java</exclude></excludes>
     </resource>
   </resources>
   ...
</build>
Using the component in a page
Replacing the old code with newly created component is the easiest part. You
simply delete what you've put to the component's code, and put a placeholder in
HTML and construct our specialized compoment instead of former
BookmarkablePageLink.
In HTML, you may keep the content and remove wicket:id's to
help the future reader have easier imagination of what's inside of the
compoment, or even to be able to display the HTML file in a browser. The content
will be replaced by Wicket, according to it's child components.
<tr wicket:id="resources">
   <td>
       <a href="#" wicket:id="reslink">
          <img src="ResourceMachine.gif"/>
          <span>jawa01</span>
       </a>
   </td>
   ...
</tr>
// Link itself. We're giving the resource as the parameter for the Resource page.
new ResourceLink("reslink", item.getModelObject().getResource() ))
That's all.
